Wednesday, July 26, 2006

My Current Firefox Extensions


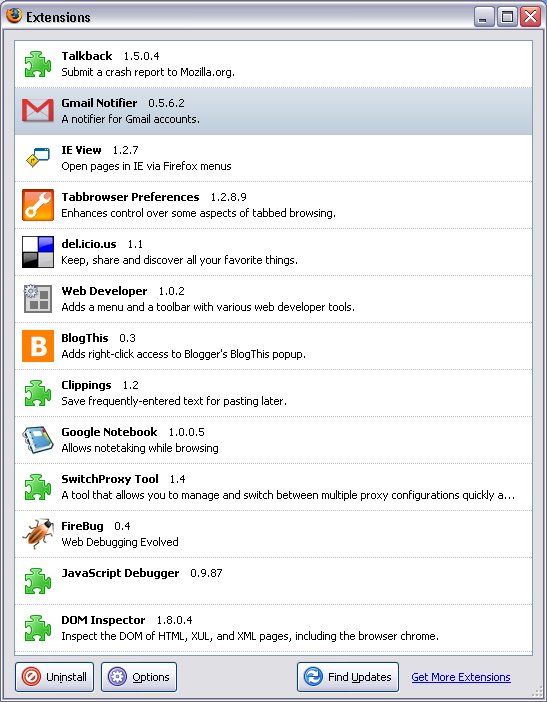
Here's a snap of my current firefox extensions. Not too few, not too many, but just enough...


Tuesday, July 11, 2006

EJB 3.0: One Model Inside and Out (Pt. 2) - The POJO Model Itself – Annotations and Relationships

Please note, this blog entry is based heavily on many other things out there on the web at the moment, most particularly this tutorial on netbeans.org. I've taken this liberty, as I thought I needed to provide a firm bedrock upon which to build my later entries in this series where I do go into uncharted territory. If I have infringed any copyright, please do tell me and I will take appropriate action.

I hate databases. We don't get on. They don't respect me, and as a result I don't respect them. Therefore I always like to start my OO apps. by encapsulating the domain model in a class model. For the Loads-A-Movies project mine was very simple:

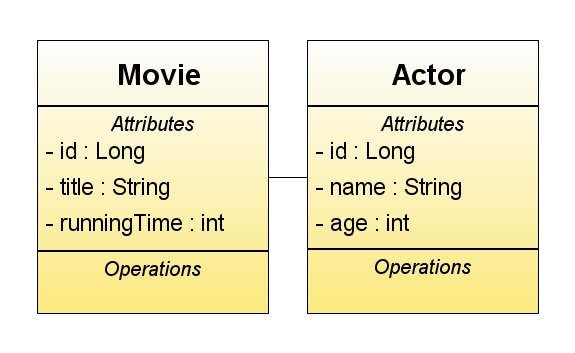
If it looks simple, it's supposed to. Lets create the classes.

Creating the Movie Entity Class

This will represent the table “MOVIE” in the database. We first need to generate a simple, serializable java POJO class with the attributes shown above encapsulated as appropriate (you can do this automatically with your chosen GUI). This now needs to be annotated to let the compiler know how to treat it. (Note: This requires JDK annotation support which you'll get if you use Java 5)

 ...
public class Movie implents Serializable {
private Long id;
private String title;
private int runningTime;

public Long getId() {
return id;
}

public void setId(Long id) {
this.id = id;
}
...

First up we need to let on this is an Entity Class. We do this simply by using the “@Entity” annotation before the “public class Movie implements Serializable” line. The compiler is now clever enough to know that, unless told otherwise, the attributes on this class will be represented as columns in our table. That's how EJB 3.0 works. It assumes the default, unless you tell it different. Very handy.

 ...
import javax.persistence.Entity;
...
@Entity
public class Movie implents Serializable {
...

The observant amongst you will realise that we most likely need a primary key. Correct, each entity class must have a primary key. When you create the entity class, we must add an @Id annotation to the “id” attribute to declare we plan to use it as the primary key. We also add the @Generated... annotation to specify the key generation strategy for the primary Id. In our case:

 ...
import javax.persistence.GeneratedValue;
import javax.persistence.GenerationType;
import javax.persistence.Id;
...
@Id
@GeneratedValue(strategy = GenerationType.AUTO)
private Long id;
...

Finally for Movie, there is the interesting case of the relationship with the Actor Entity class. Firstly we need to add the collection attribute, “Collection actors;” and encapsulate it (again you can do this automatically with your GUI if you so desire). Now you need to provide some information about the relationship. Add the following annotation above the actors collection to specify a One-to-Many relationship for the entity:

  import javax.persistence.OneToMany;
...
@OneToMany(mappedBy="movie")
private Collection actors;
...

And that's the Movie Entity class coded. We now need to do the same for the Actors. As before, create a POJO class (ensuring you “implement Serializable”) with the required attributes encapsulated. This will represent the "ACTOR" table in the database. Again define it as an Entity with the @Entity annotation and mark the “id” attribute as the primary key and set it to
be auto generated with the @Id and @Generated tags.

Again we need to add the new attribute. in this case it's the Actior nowing about the film he has appeared in:

 private Movie movie;

Again, encapsulate this attribute. Finally we need to add the annotation to let on that this is the reverse direction of the previous relationship. We do this by putting the following annotation above the new movie declaration:

  import javax.persistence.ManyToOne;
...
@ManyToOne

private Movie movie;

Note: You'll have noticed that you require imports for these annotations. These are contained in the “javaee.jar” package which I needed to declare as a dependency in my maven project.xml file. I found the one I used in my GlassFish server's /lib directory. If you're doing it differently maybe your IDE has suggested one for you.


That's all for this entry. There is far more information on the possibilities of EJB 3.0 persistence which I haven't gone into. The best sources for more information I have found are as follows:

EJB 3.0 - One Model Inside and Outside the Container (Pt. 1)

I'm writing a suite of (i.e. two) applications which share an object model. I'm a trained J2EE architect and consequently I love the idea of maximum code reuse. I'm also lazy. In the following series of blog entries I'm going to explain how I managed to achieve this using Java 5, EJB 3.0 (including persistence) and Maven.

First up, lets have a quick overview of what I'm trying to achieve. The plan is to create a website to store information about my film collection. I want to be able to do all kinds of fancy things but really it's an excuse to fiddle around with Java 5, generics, annotations, JSF, EJB 3.0 and Maven. I have a cunning plan however. I love the idea of the Flickr uploader but I want to take it further. What if I could have a local, thick Swing app. which I could keep in sync. with my web app. and use to upload and maintain info on my public website? It could use the same model code... That would be cool. It would also let me fiddle with the Matisse GUI builder, Derby and most importantly the Napkin look and feel...

So how am I going to approach this? Well, the plan is to have three separate maven projects, with all the common stuff factored out into a code-less master project (I won't go into this any further, that's a separate blog entry). The first is to be the model project; “loadsamovies-model” which we will discuss in the next blog, the second the web presentation layer; “loadsamovies-presentation” which I don't plan to go into as the techs and methods is covered in great detail elsewhere. The last is the uploader Swing app; “loadsamovies-thickclient”

See the next entry for how I coded up the model.

Sunday, July 09, 2006

Booting Apache Derby ("JavaDB") with your Java App's Startup

If you're embedding the Derby RDBMS with your java desktop application and want it to start when you start your app, you need to make the following call somewhere in your code (i.e. in main() or an init() method):
        // Start the Derby Database
try {
Class.forName("org.apache.derby.jdbc.EmbeddedDriver")
.newInstance();
} catch (ClassNotFoundException ex) {
ex.printStackTrace();
} catch (InstantiationException ex) {
ex.printStackTrace();
} catch (IllegalAccessException ex) {
ex.printStackTrace();
}

// Set the connection to the database
Connection conn = null;
try {
conn = DriverManager
.getConnection("jdbc:derby:sample;create=true");
} catch (SQLException ex) {
ex.printStackTrace();
}

It's important to notice (as I didn't to begin with) that you need the local version of the URL as you are doing this using the embedded driver. If you use the URL version you'll get a "java.sql.SQLException: No suitable driver" error.


You'll also notice that this creates the database with the name provided in a directory with the name provided, (e.g. "sample"). This directory will be in the same place as the main class you are running.

One final thing, this is dead easy to use with EJB 3.0 too. All you need to do is set up your persistence manager to run outside a container and as soon as you have started your embedded database, you can connect to it with something like TopLink. Beautiful....

Saturday, July 08, 2006

Ubuntu Superusers

I came to Ubuntu (Dapper Drake) from Solaris. I thought I'd be able to log in as the root user or su from the command line to my heart's content. It's not that simple. By default you can't log in or su to the root user as I expected. To perform admin tasks as a non root user you need to use the sudo command (this was in fact running for me withjout my knowledge as I ran the various admin tasks to set things up after install. For info on the sudo command, look at the Dapper documentation wiki.